
Adding Corona (Lens Flare) Effects
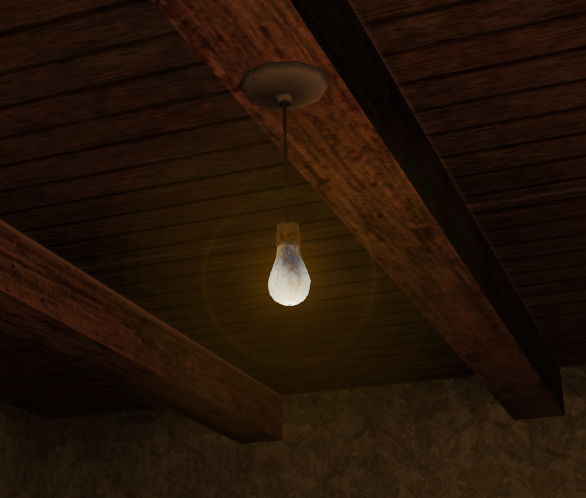
This guide explains how to add corona (lens flare) effects to your Call of Duty multiplayer map using a custom script and assets. Follow the steps below to implement the effect correctly.
Note: The corona effect in the Radiant right-click menu may not function properly. Instead, use the provided script and assets below, or create your own using the Asset Manager and Effects Editor.
Step 1: Creating the Corona Script
To add the corona effect, you need to create a script file named _corona.gsc in your main/maps/mp folder (for multiplayer maps).
- Create a new text file named
_corona.gscin themain/maps/mpfolder. - Open the file in a text editor and add the following code:
// File: maps/mp/_corona.gsc
// Purpose: Plays a corona effect specified by script_noteworthy at script_corona entity origins, with fallback to fx/misc/missing_fx
// Entities: script_corona (classname)
// Key-Value Pairs:
//   - script_noteworthy (string): Specifies the FX to play (optional, full path, e.g., "fx/misc/corona_sun")

corona_main()
{
    // Get all entities with classname "script_corona"
    coronas = getentarray("script_corona", "classname");

    // Process each corona entity
    for (i = 0; i < coronas.size; i++)
    {
        coronas[i] thread corona_effect();
    }
}

// Function to play the corona effect
corona_effect()
{
    // Use script_noteworthy if defined, otherwise use fallback
    if (isdefined(self.script_noteworthy))
        fx_name = self.script_noteworthy; // Expects full path, e.g., "fx/misc/corona_sun"
    else
        fx_name = "fx/misc/missing_fx";

    // Load and play the effect (will crash if fx_name is invalid)
    level._effect[fx_name] = loadfx(fx_name);
    maps\mp\_fx::loopfx(fx_name, self.origin, 0.3, self.origin + (0, 0, 1));
}
Save the file after adding the code.
Step 2: Updating Your Map's GSC File
Next, modify your map's GSC file (mp_yourmapname.gsc) to include the corona script.
- Open
mp_yourmapname.gscin a text editor. - Add the following line at the top of the file:
#include maps\mp\_corona;
In the main() function of the same file, add the following line:
maps\mp\_corona::corona_main();
For example, your main() function might look like this:
main()
{
    level._effect = [];
    maps\mp\_load::main();
    maps\mp\_corona::corona_main();

    game["allies"] = "american";
    game["axis"] = "german";
    game["attackers"] = "allies";
    game["defenders"] = "axis";
}
Step 3: Adding Assets
To use pre-made sunflare assets, download the sunflares.zip file from the following link and extract it to your Call of Duty folder:
Step 4: Setting Up in Radiant
Follow these steps to configure the corona effect in Radiant:
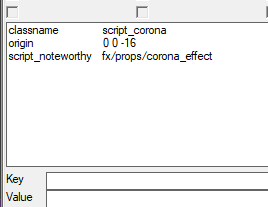
- In the Radiant 2D view, right-click and select script > origin.
- With the script origin selected, press N to open the entity window.
- Change the
classnamekey toscript_corona. - Add a new key named
script_noteworthyand set its value to the path of your FX file.
If using the provided assets, choose one of the following FX file paths based on your desired effect:
| Filename | Description | Color Swatch |
|---|---|---|
| fx/props/corona_effect | Default corona effect | N/A |
| fx/props/corona_effect_candle255_147_41 | Candle-like warm glow | |
| fx/props/corona_effect_mercury_200_255_255 | Cool mercury-like glow | |
| fx/props/corona_effect_tungsten_255_197_143 | Tungsten warm glow |
Hint: The RGB codes in the filenames (e.g., 255_147_41) indicate the color of the effect. Choose the effect that best matches your map's lighting.
You can place multiple script origins in your map, and the corona effect will play at each location.
Step 5: Compiling Your Map
After setting up the script and assets, compile your map in Radiant to apply the changes.